Ghana-Kumasi

Advanced Smart Parking System with Traffic Light Module – Complete Project Guide
The Advanced Smart Parking System is designed to automate vehicle entry management using an ultrasonic sensor, servo motor, buzzer, and traffic light module.
COMPONENTS REQUIRED
| Component | Quantity | Description |
|---|---|---|
| Arduino Uno | 1 | Main microcontroller board |
| Ultrasonic Sensor (HC-SR04) | 1 | Detects approaching vehicles |
| Servo Motor (SG90) | 1 | Operates the gate arm |
| Active Buzzer | 1 | Provides warning beeps |
| Traffic Light Module (Red, Yellow, Green) | 1 | Indicates gate status to drivers |
| Breadboard | 1 | For circuit assembly |
| Jumper Wires | Several | For electrical connections |
| 2-Slot AA Battery Holder | 1 | Powers the Arduino (3V) |
| 3D Printed Container | 1 | Holds all components neatly |
WIRING CONNECTIONS
1. Ultrasonic Sensor (HC-SR04)
| HC-SR04 Pin | Arduino Pin |
|---|---|
| VCC | 5V |
| GND | GND |
| Trig | 10 |
| Echo | 11 |
2. Servo Motor
| Servo Wire | Arduino Pin |
|---|---|
| Brown | GND |
| Red | 5V |
| Orange | 6 |
3. Traffic Light Module
| Traffic Light Pin | Arduino Pin |
|---|---|
| Red | 12 |
| Yellow | 13 |
| Green | 8 |
4. Buzzer
| Buzzer Pin | Arduino Pin |
|---|---|
| + | 2 |
| – | GND |
5. Battery Holder
| Battery Wire | Arduino Pin |
|---|---|
| Red (+) | VIN |
| Black (–) | GND |
6. Breadboard Power Lines
Connect Arduino 5V to the breadboard’s red rail.
Connect Arduino GND to the blue rail.

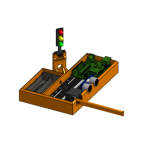
MOUNTING IN THE 3D PRINTED CONTAINER
Base Container
As shown in the first image, the orange 3D printed base includes compartments for:
Breadboard in the center
Servo motor on the right side
Battery holder at the left section
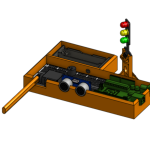
Complete Assembly
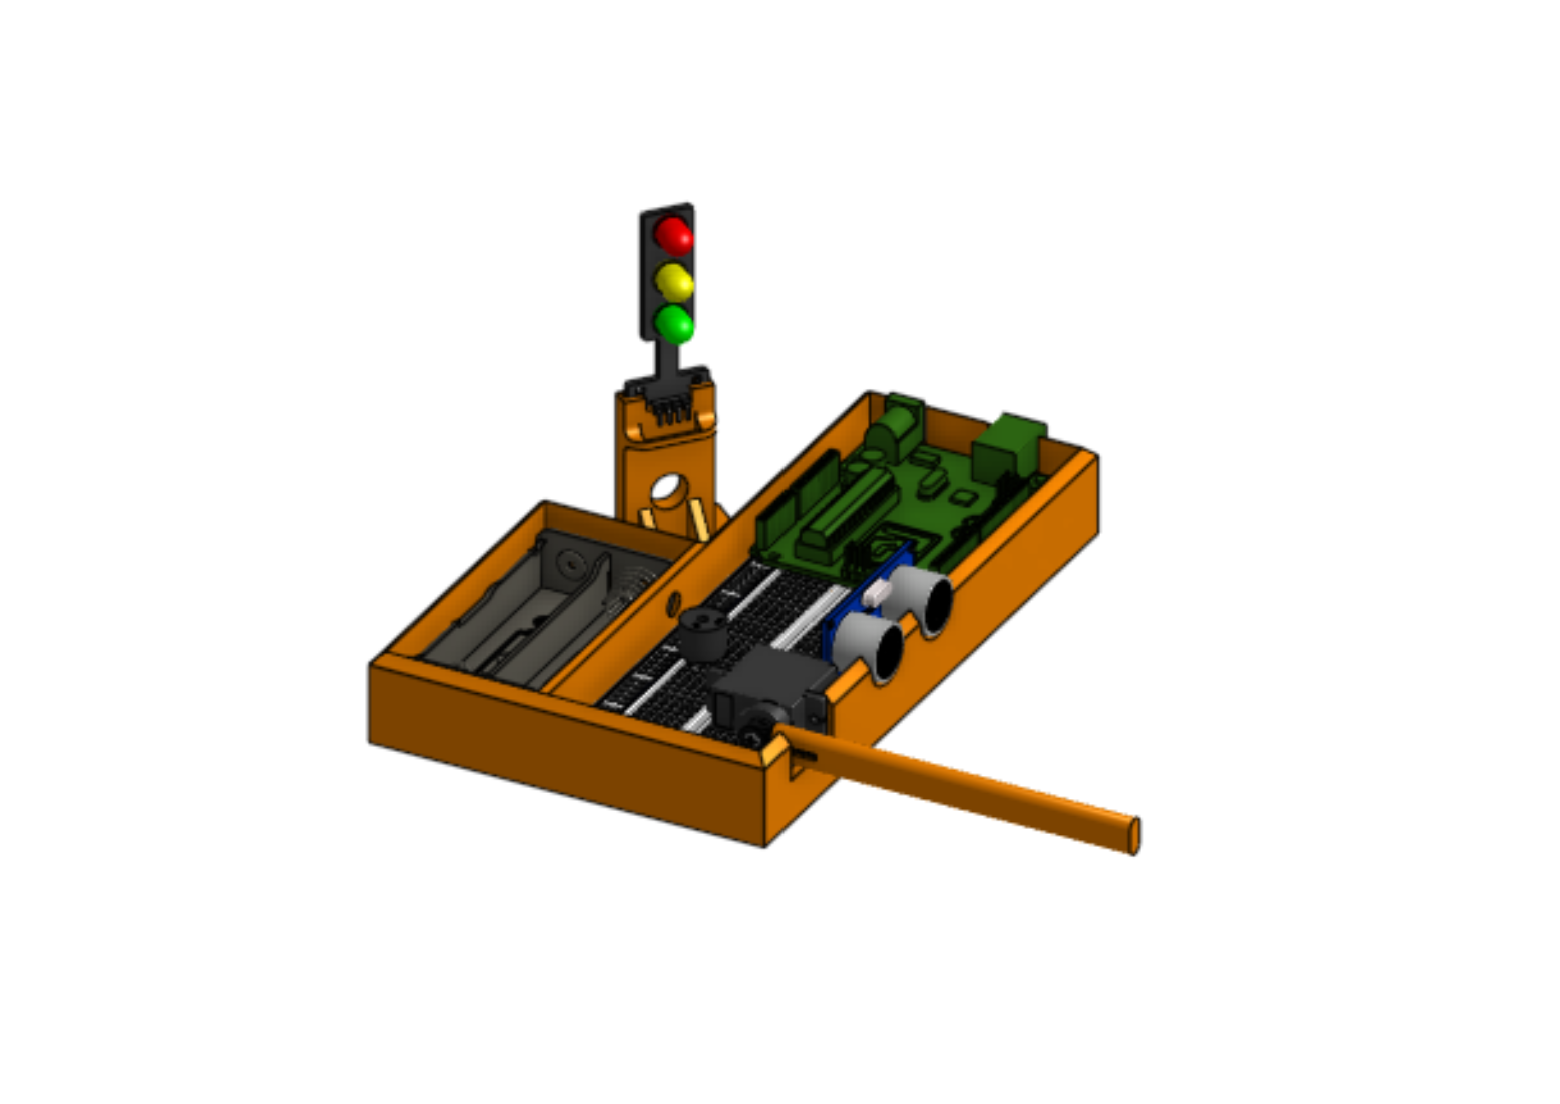
The second image shows the assembled setup, including:
Ultrasonic sensor mounted through the two circular front holes.
Traffic light module standing beside the servo arm.
Arduino and breadboard fitted neatly inside the base.
Servo connected to the red gate arm, which moves up and down to control access.
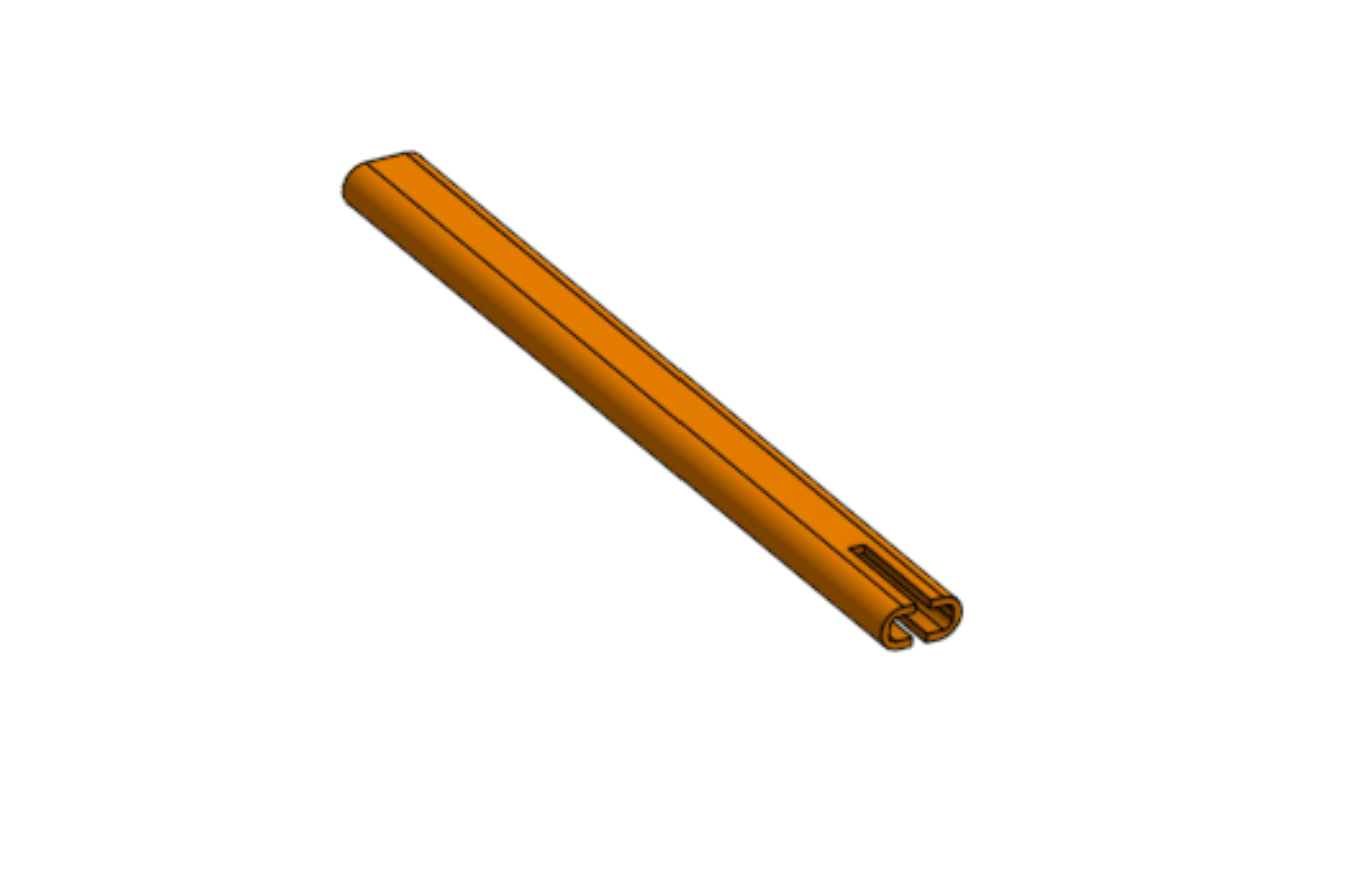
Gate Arm
The third image shows the 3D printed gate rod.
Attach it firmly to the servo horn using small screws.
When the servo rotates:
0° = Gate Closed
90° = Gate Open
ARDUINO CODE
#include <Servo.h>
// Pin Definitions
const int trigPin = 10;
const int echoPin = 11;
const int buzzerPin = 2;
const int servoPin = 6;
// Traffic Light Pins
const int redPin = 12;
const int yellowPin = 13;
const int greenPin = 8;
// Distance threshold in cm for car detection
#define DISTANCE_THRESHOLD 5
// Variables for ultrasonic measurement
long duration;
int distance;
// Servo object
Servo myServo;
// Track car detection time
unsigned long lastCarDetectedTime = 0;
const unsigned long CAR_TIMEOUT = 3000; // 3 seconds after last car before closing
bool gateOpen = false;
void setup() {
Serial.begin(9600);
Serial.println(“Smart Parking System with Traffic Lights Initialized”);
pinMode(trigPin, OUTPUT);
pinMode(echoPin, INPUT);
pinMode(buzzerPin, OUTPUT);
pinMode(redPin, OUTPUT);
pinMode(yellowPin, OUTPUT);
pinMode(greenPin, OUTPUT);
myServo.attach(servoPin);
myServo.write(0);
// Start with red light
digitalWrite(redPin, HIGH);
digitalWrite(yellowPin, LOW);
digitalWrite(greenPin, LOW);
delay(1000);
}
void loop() {
// Ultrasonic measurement
digitalWrite(trigPin, LOW);
delayMicroseconds(2);
digitalWrite(trigPin, HIGH);
delayMicroseconds(10);
digitalWrite(trigPin, LOW);
duration = pulseIn(echoPin, HIGH, 30000);
distance = duration * 0.034 / 2;
Serial.print(“Distance: “);
Serial.print(distance);
Serial.println(” cm”);
bool carDetected = (distance > 0 && distance <= DISTANCE_THRESHOLD);
if (carDetected) {
lastCarDetectedTime = millis();
if (!gateOpen) {
Serial.println(“Car detected – Opening gate!”);
digitalWrite(redPin, LOW);
digitalWrite(yellowPin, HIGH);
digitalWrite(greenPin, LOW);
for (int i = 0; i < 3; i++) {
digitalWrite(buzzerPin, HIGH);
delay(200);
digitalWrite(buzzerPin, LOW);
delay(200);
}
for (int angle = 0; angle <= 90; angle++) {
myServo.write(angle);
delay(15);
}
gateOpen = true;
digitalWrite(redPin, LOW);
digitalWrite(yellowPin, LOW);
digitalWrite(greenPin, HIGH);
delay(3000);
}
// While car is still passing
digitalWrite(buzzerPin, HIGH);
delay(100);
digitalWrite(buzzerPin, LOW);
delay(100);
}
else if (gateOpen && millis() – lastCarDetectedTime > CAR_TIMEOUT) {
Serial.println(“No car detected – Closing gate”);
digitalWrite(redPin, LOW);
digitalWrite(yellowPin, HIGH);
digitalWrite(greenPin, LOW);
for (int i = 0; i < 3; i++) {
digitalWrite(buzzerPin, HIGH);
delay(200);
digitalWrite(buzzerPin, LOW);
delay(200);
}
for (int angle = 90; angle >= 0; angle–) {
myServo.write(angle);
delay(15);
}
gateOpen = false;
digitalWrite(redPin, HIGH);
digitalWrite(yellowPin, LOW);
digitalWrite(greenPin, LOW);
}
delay(50);
}
TESTING AND OPERATION
Upload the above code to your Arduino Uno using the Arduino IDE.
Power the setup using the 2-slot AA battery holder or USB connection.
Place an object (e.g., a toy car) within 5 cm of the ultrasonic sensor.
The system will:
Beep three times.
Turn the traffic light Yellow, then Green.
Open the gate arm smoothly to 90°.
While the car passes, the buzzer will continue to beep softly (“pii pii pii”).
Once no vehicle is detected for 3 seconds:
The light changes Yellow, then Red.
The gate closes automatically.
EMMANUEL ADU DONKOR
Am Emmanuel ADU Donkor CEO of LEARN STEM AFRICA